Overview
- PolyJet 3D printing is a versatile but expensive technology that creates parts by jetting and curing liquid photopolymer layers, offering high-resolution prints with smooth surfaces. This method excels at producing multi-material and multi-color prototypes with complex geometries. If your application is low-strength and requires fine detail or varied material properties, PolyJet could be an excellent choice.
TEAM Lab Hardware
Stratasys Connex 260V

Build Volume: 255 x 252 x 200 mm
Accuracy: Extremely high: 22 micron layer thickness, Overall 0.05mm to 0.15 mm accuracy (geometry and material dependent). Smallest free-standing feature approximately 0.1mm to 0.3mm
Build Materials: Proprietary UV curing resins. Vero (White), Tango+ (Amber-Translucent or Black), MED610 (Clear)
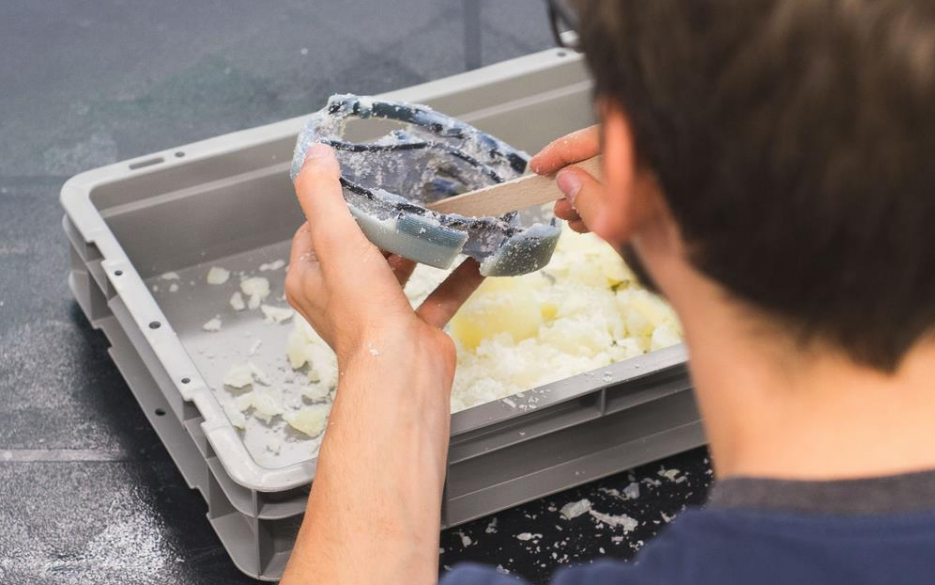
Support Structures: Gel-Like secondary material (removed via water jet)
Unique Properties:
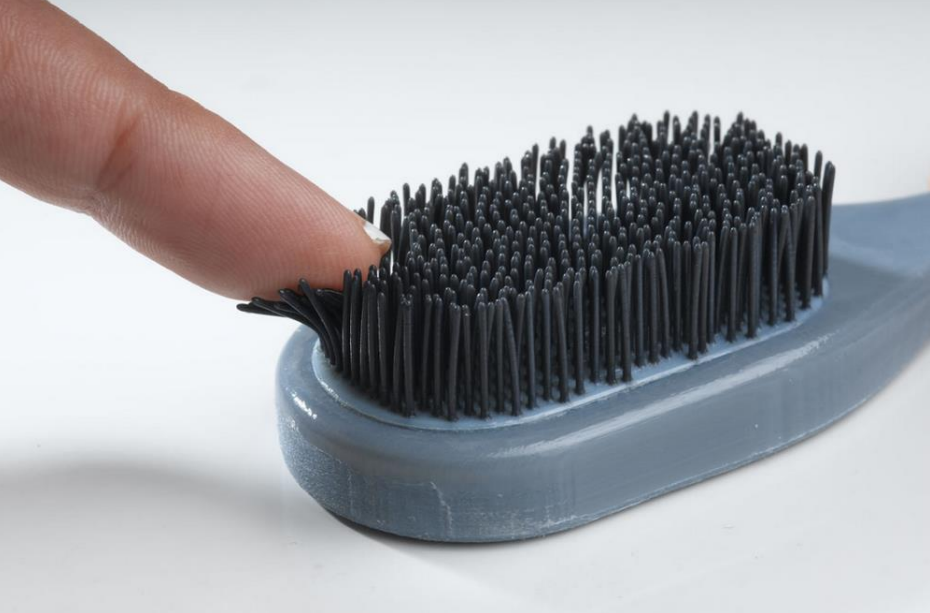
- Multi-material printing via two base materials, plus intermediate blended "digital materials."
- Dedicated support structure (SUP705) removed via high-pressure H2O
Materials
Build Materials:
Vero
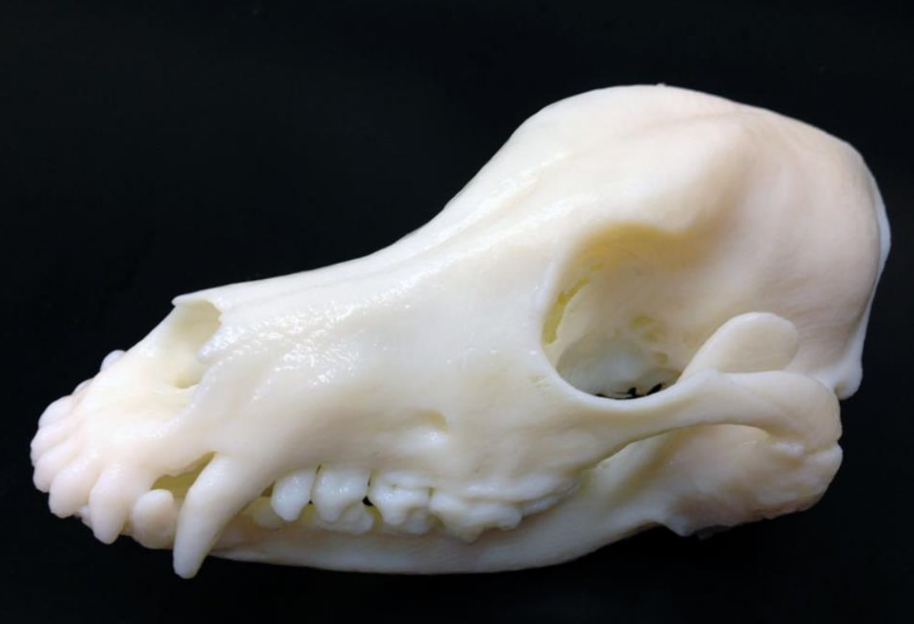
A rigid, opaque photopolymers known for it's dimensional stability and smooth finish. Note: At TEAM, we only stock Vero in white only. Vero is best suited for geometrically complex models and multi-material prints where mechanical strength is not a priority. With relatively low strength and durability, it’s ideal for visual models and low-strength prototypes.
Tango+
A flexible, rubber-like material used in PolyJet 3D printing, ideal for applications requiring a soft touch and flexibility. The TEAM lab stocks this material in translucent or black. It’s best suited for visual prototypes, grips, and models that mimic rubber-like properties, though it is not recommended for parts requiring durability or strength.
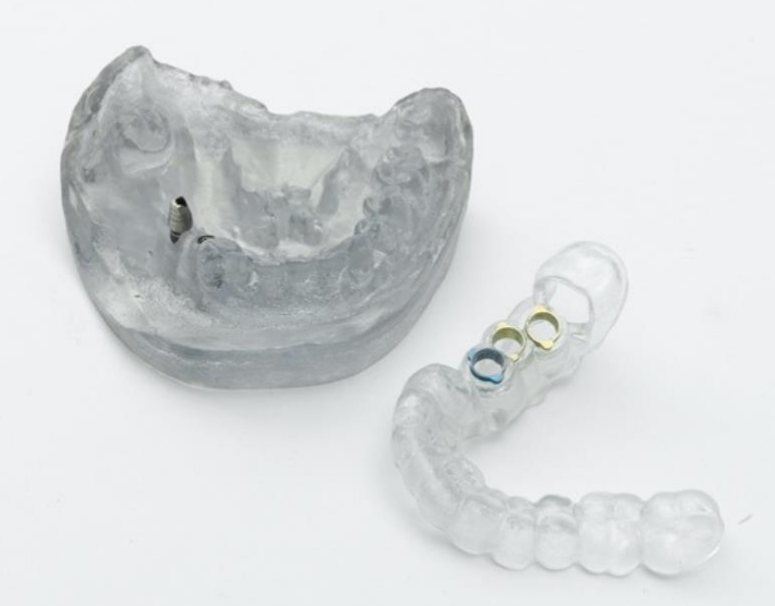
MED610
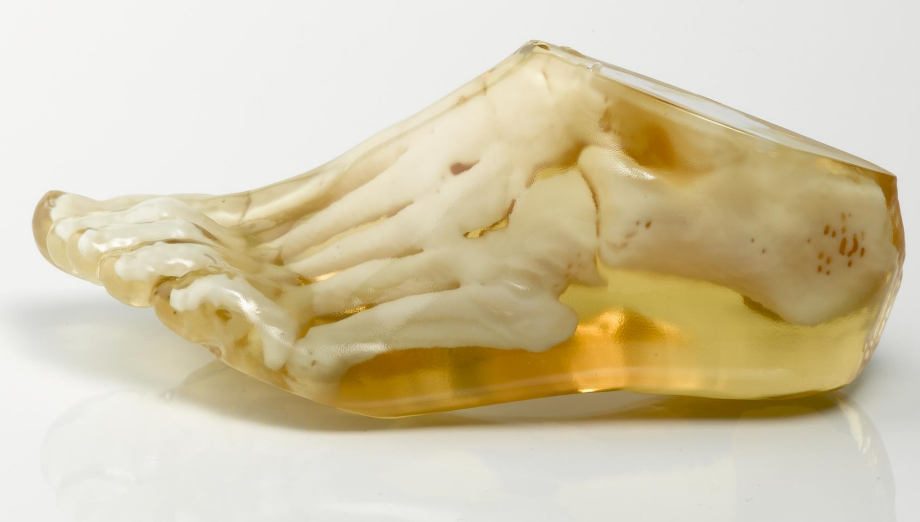
A biocompatible, rigid photopolymer used in PolyJet 3D printing, designed for medical and dental applications. It offers excellent transparency and dimensional stability, making it suitable for surgical guides, medical models, and other applications requiring temporary skin or mucosal membrane contact. While MED610 provides good visual detail and accuracy, it’s intended primarily for short-term use and isn’t designed for parts needing long-term durability.
Digital Materials:
Digital materials are created by combining multiple base photopolymers during the PolyJet 3D printing process, allowing for custom properties such as varying hardness, flexibility, and color in a single part. This versatility makes digital materials ideal for multi-material prototypes, and realistic models that require a combination of different textures or mechanical characteristics.
Multi-Materials:
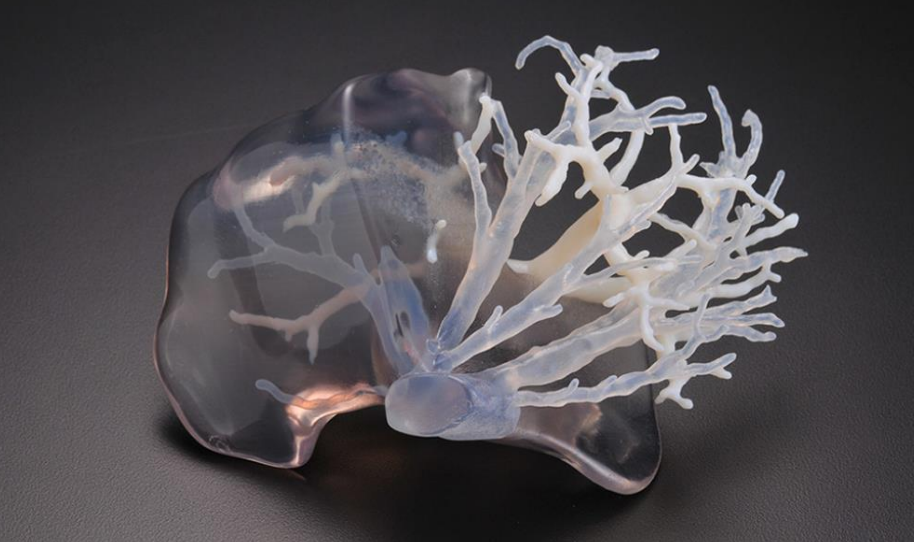
A key strength of PolyJet 3D printing is its ability to create parts with multiple materials in a single print. This includes combining translucent and opaque features, using multiple colors, or incorporating different mechanical properties within the same part.
Support Materials:
SUP705
SUP705 by Stratasys is a gel-like support material used in PolyJet 3D printing, designed for easy removal via H2O pressure washer. It’s ideal for supporting complex geometries, allowing for high-precision prints without compromising delicate features. SUP705 ensures accurate and detailed results, but it is strictly a support material, not intended for structural use.
Comparison to other printing technologies
Contrasted with FDM
PolyJet offers higher resolution, smoother surface finishes, and supports blended multi-material printing, unlike FDM. However, PolyJet parts are generally less durable and far more expensive. While FDM excels in strength and cost-effectiveness for functional prototypes, PolyJet is better suited for detailed visual models or parts requiring complex geometries and varied material properties.
Contrasted with Reinforced FDM
Reinforced FDM provides superior mechanical strength compared to PolyJet but lacks the ability to print with multiple materials or colors. PolyJet is ideal for producing complex designs with different textures or visual features, but it cannot match the enhanced stiffness and durability of reinforced FDM parts. These platforms are similar in cost, only.
Contrasted with SLA or MSLA (Resin Printing)
PolyJet offers the unique ability to print multi-material parts, but SLA/MSLA parts often outperform PolyJet in mechanical strength. SLA/MSLA-based methods also tend to be more cost-effective for single-material, high-detail applications, especially for functional parts requiring sterilization or use in medical applications.
Contrasted with DLP (Microfluidic Printing)
While both PolyJet and DLP can produce high-resolution parts with smooth finishes, DLP is specifically tuned for microfluidic applications, offering better clarity and precision for such purposes. PolyJet, with its multi-material capabilities, is more versatile but not as specialized for these fine-tuned, high-precision applications.
Examples:


Polyjet Printing Gallery
Click here to view more example polyjet prints.
Rates
- Note: We strongly recommend submitting a service request to obtain an accurate project cost estimate. Self-quoting can often lead to miscalculations
- Already have a quote from another vendor? Share it with us and we'll match or beat it.
We bill for time and materials while using our Polyjet printers. For time, we assess 1 hour of assisted time per-print tray plus an hourly rate for machine use. Maximizing tray capacity with your parts—whether identical or varied—significantly reduces per-unit part cost.
| Description | Internal | External | |
| Support Materials | Per-gram expense for support materials (SUP705) | $0.20/ml | $0.30/ml |
| Build Materials | Per-gram expense for build materials in-stock (Vero, Tango, MED610) | $0.60/ml | $0.80/ml |
| Setup and Processing | 1 hours of our assisted rate ($119/hour) per tray (not object) | $119/tray | $160/tray |
| Hourly Use Rate | Expense per hour of machine use | $11/hour | $14/hour |
Estimating project cost should be left to TEAM, but here are some general project estimates that can guide in self-estimating:
| Relative Project Scale | Cost for First Batch of Parts, Typical Range | Cost for Additional Batch of Parts, Typical Range |
| Small | $120 | $15-$30 |
| Medium | $120-$200 | $30-$150 |
| Large | $200-$500 | $150-$350 |
| Extra Large | $500+ | $350+ |
*All declared values at internal rates, NUD = university required "Non-University Differential" added for external.
Preparing Files for Printing:
The team lab suggests two sets of files for each 3D printed part (where possible) – the original parametric model file (Solidworks/Inventor/Fusion360/etc), and a millimeter scale STL file (point-mesh file). Please include these files on your project request if possible.
For multi-material prints, we require one STL file for each material in a shared coordinate system. Please work with TEAM lab staff to ensure this constraint is satisfied.
Technical Details
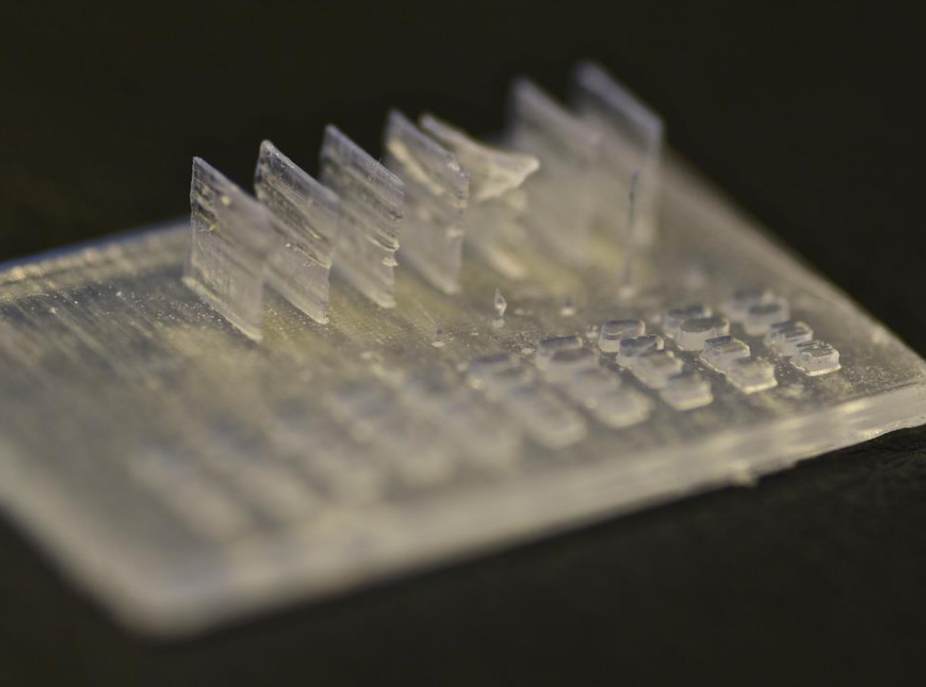
PolyJet printing is a 3D deposition process similar to traditional 2D inkjet printing, but instead of ink, it jets UV-curable liquid resin onto a build platform, where it solidifies immediately upon exposure to UV light. This process is repeated layer by layer. After printing, a gel-like support structure is removed using high-pressure water.
With layer sizes around 22 microns, PolyJet offers precision far exceeding FDM and slightly surpassing SLA in accuracy. However, this precision comes at the cost of weaker and more expensive materials.
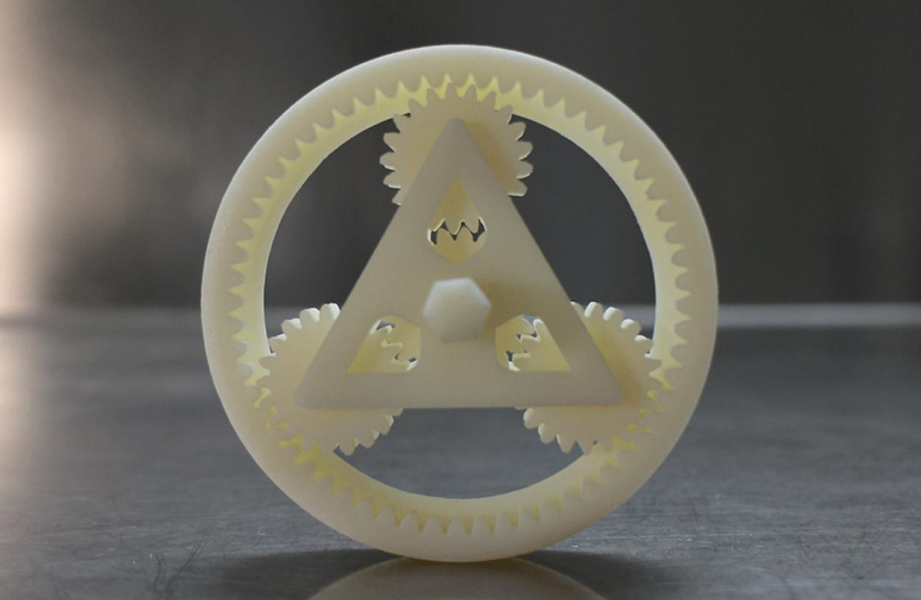
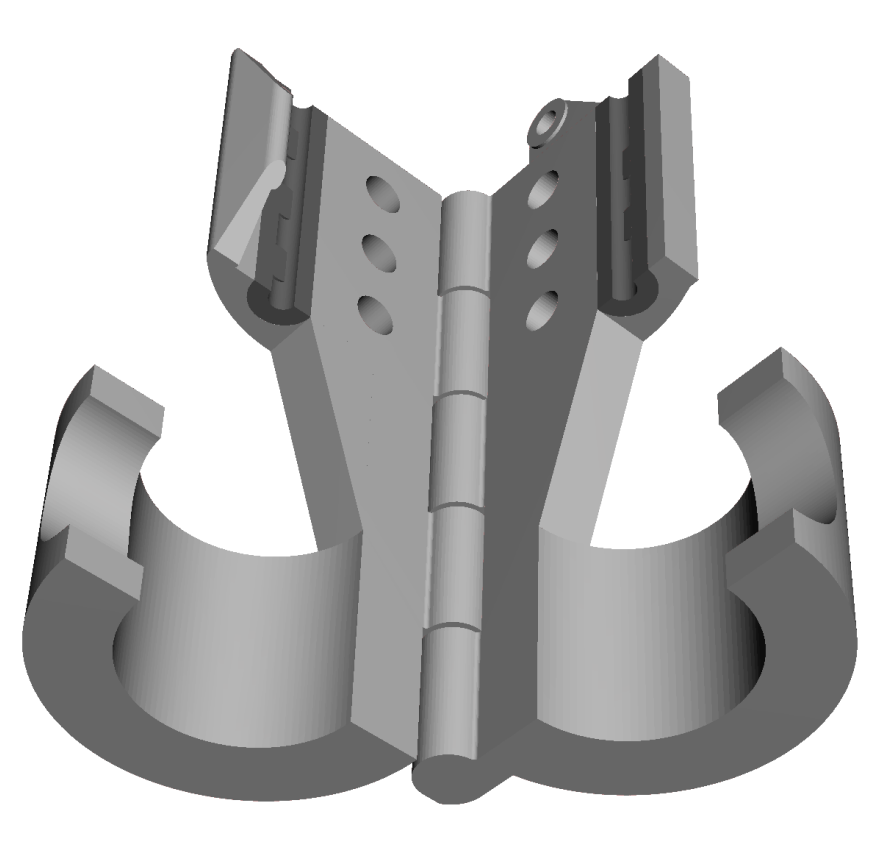
The use of dedicated support structures enables “printed assemblies,” where multiple components are printed together, held in place by the support material, and separated after cleaning. For example, the planetary gears shown below were printed as a single unit with support material isolating each component, eliminating the need for post-print assembly.
Our PolyJet printer supports multi-material printing, allowing two distinct materials to be combined in precise ratios for customized properties. For instance, a rigid polymer can be paired with a flexible polymer in the same part, enabling different areas to have varied mechanical characteristics. These materials can also be blended to create intermediate properties, such as adjusting stiffness by using different material ratios. This same technique can be applied to opaque and translucent materials, giving control over optical properties, like transparency and light diffusion.
Expanded Materials Description:
The materials this printing technology uses are all proprietary, with most being either acrylic, or vinyl derived.
The materials that we make most frequent use of are as follows:
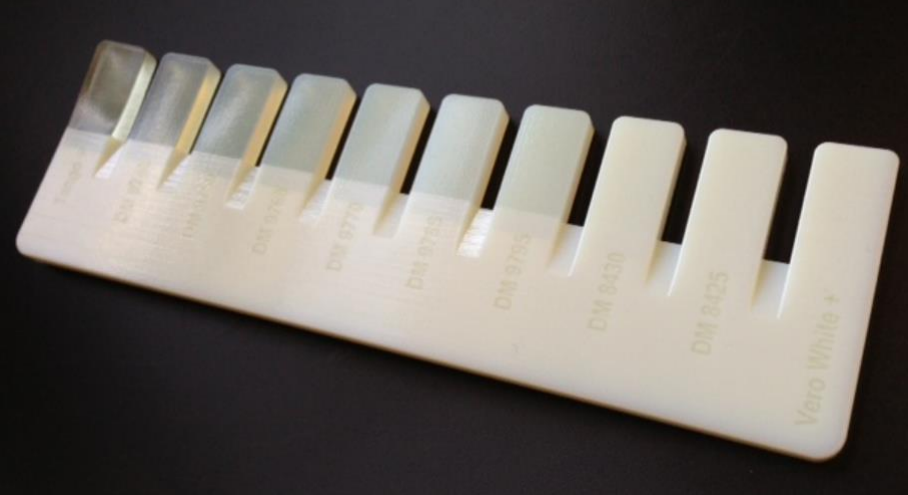
Vero+: Rigid acrylic derived polymer, comes in white (stocked, VeroWhite+) or black (not typically stocked, VeroBlack+)
Tango+: Flexible vinyl “rubber like” polymer, comes in translucent amber (Tango+) or black (TangoBlack+).
Gray60: Gray/Blue colored hybridized mixture between Vero, and Tango materials. Slighly enhanced impact strength, slightly less brittle than Vero alone. True Grey60 is a mixture between VeroWhite+ and TangoBlack+, but we often use VeroWhite+ and Tango+ to achieve the same mechanical properties in a White colored print.
Digital Materials: Mixture of Vero and Tango class materials, typically specified in shore hardness when soft enough to become flexible. Contact lab staff for details on available ratios.
MED610: Rigid translucent (which can become clear when polished) material. Described as: “ideal for applications requiring prolonged skin contact of more than 30 days and short-term mucosal-membrane contact of up to 24 hours. Bio-compatible material has five medical approvals including cytotoxicity, genotoxicity, delayed type hypersensitivity, irritation and USP plastic class VI.”
Designing for Polyjet Printing:
The team lab requires two sets of files for each 3D printed part – the original parametric model file (Solidworks/Inventor/Fusion360/etc), and a millimeter scale STL file (point-mesh file)
Clearance between assemblies, General Fit and Finish
When printing assemblies in a fully assembled state, the minimum suggested clearance (gap) between two faces (to prevent accidental bonding, and permit cleaning) is 0.3mm.
Some finishing (sanding) may be required on high-precision faces, or in cases where a very smooth finish is required/desired.
Wall Thickness
The minimum suggested wall-thickness for polyjet prints is equal to 0.3mm. Further, for free-standing features, it’s advised to limit the height-to-width ratio to less than 5:1 (for features less than 1mm in scale)
Support Structure
Note that all prints will require support structure along the underside of the print, and where overhangs are present.
If a print has an internal cavity that is inaccessible from an outside face, that cavity will be filled with support structure that cannot be removed. If this is an issue, consider splitting the part such that the support can be removed, and bonding together afterwards (if necessary).
Finish (Glossy Vs Matte)
The printer operates in two modes that ultimately influence surface finish:
“Matte” Finish Mode (default): The entire part is encapsulated in support material for a consistent nonreflective finish. These prints are generally more accurate (as the support material acts to stabilize the geometry). However, residual support material may take some gentle scrubbing to fully release (else the surface of the print may feel “soft”) when picked at.
“Glossy” Finish Mode: The print is only exposed to support structure where absolutely mandatory. This mode presents a smooth shiny finish on upward faces, but will appear different (“matte” finish) where support material is required (underside and overhangs)
Multi-material Prints
In cases where multiple materials are desired on a single print, multiple STL files must be supplied; specifically, at least one file per material type must be supplied. Further, each file must share the same coordinate system so that parts are properly registered in the printer’s deposition software.
Get Started
- Heard enough? Get started with a service request! Your request need-not be perfect, we can always revise it as we go. Just provide us with as much detail as is necessary.
- Feeling overwhelmed with the options? We don't blame you! We do a lot! Feel free to email us to set up a consultation. We're happy to chat via zoom, or in person (where we can review samples).